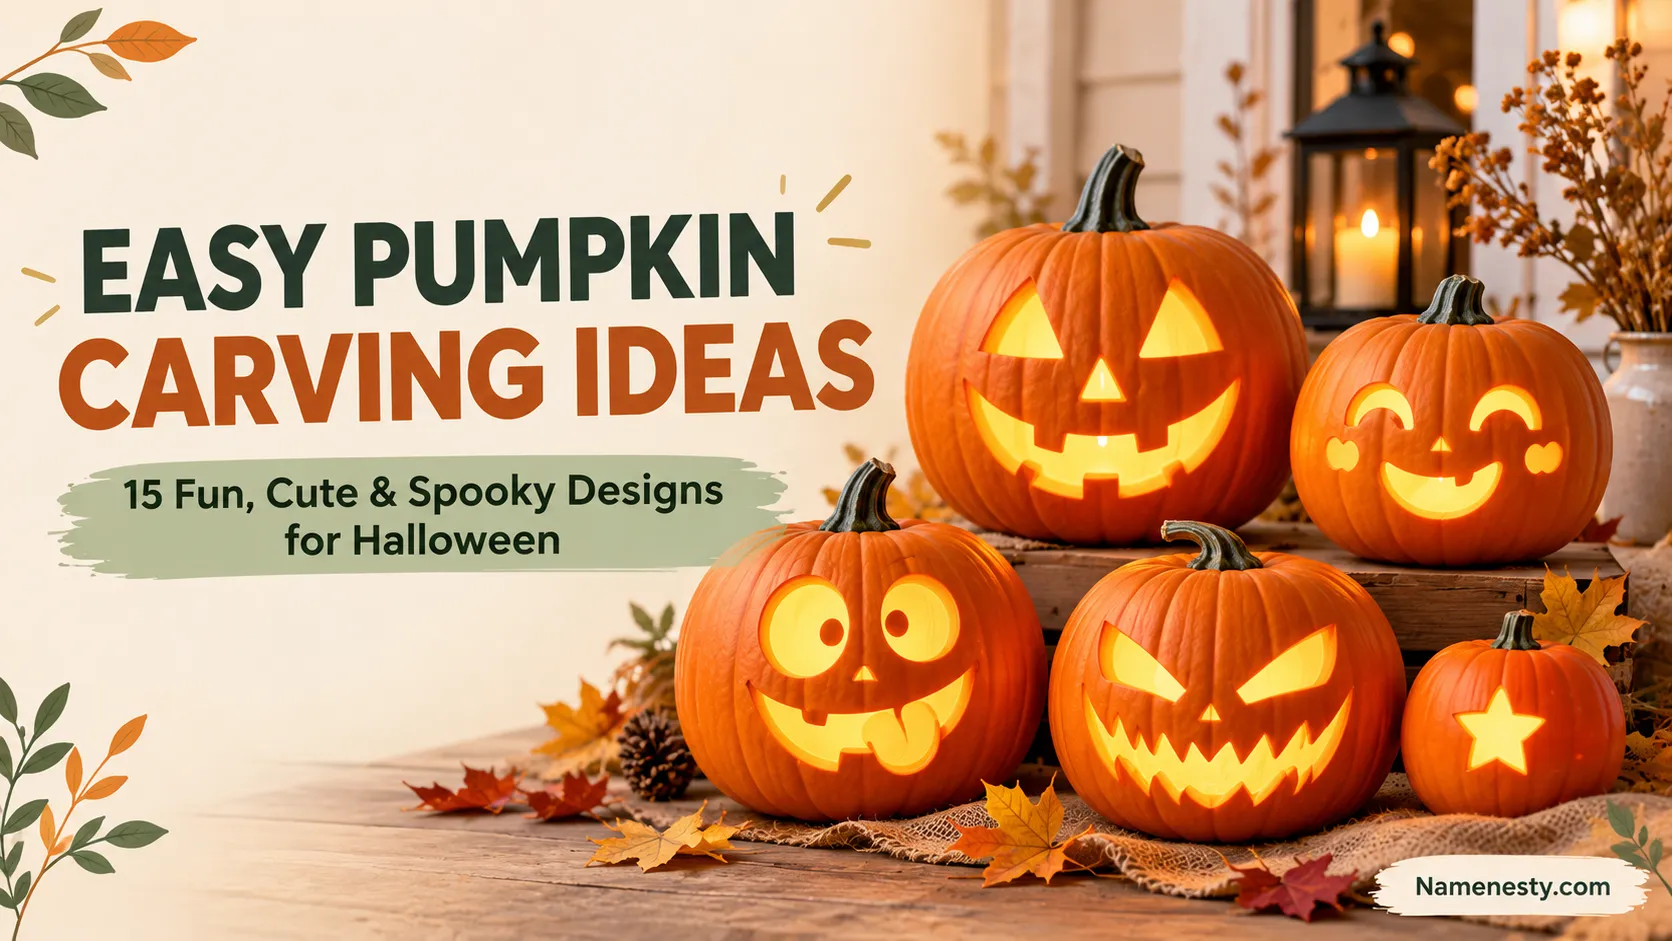
Easy Pumpkin Carving Ideas: 225+ Simple, Cute & Spooky Designs for Halloween
Create a Halloween pumpkin that looks amazing without spending hours on complicated designs? These easy pumpkin carving ideas make it simple to turn an ordinary pumpkin into something cute, funny, spooky, or stylish. Whether you’re a beginner, decorating with family, or planning the perfect Halloween photo, you’ll find inspiration for every skill level. Try a classic jack-o’-lantern, a playful cat, a creepy grin, or a minimalist moon design. You’ll also discover quick projects, small-pumpkin ideas, and no-carve alternatives. Choose your favorite, gather your supplies, and create a Halloween decoration worth showing off!
Halloween decorating doesn’t have to involve complicated patterns, expensive tools, or hours of work. With the right design, even a beginner can turn an ordinary pumpkin into a cute, funny, spooky, or surprisingly stylish Halloween decoration.
These easy pumpkin carving ideas include classic jack-o’-lantern faces, playful animal designs, minimalist patterns, quick projects, and creative options for small pumpkins. Whether you’re carving your first pumpkin, planning a family activity, or creating a picture-perfect Halloween display, you’ll find ideas to match your skill level and style.
The secret is to start with a design that suits your pumpkin’s size and shape. Simple outlines are usually easier to cut, while larger openings let candlelight or LED lighting shine through more clearly. Choose your favorite idea below, gather your supplies, and create a pumpkin worth displaying.
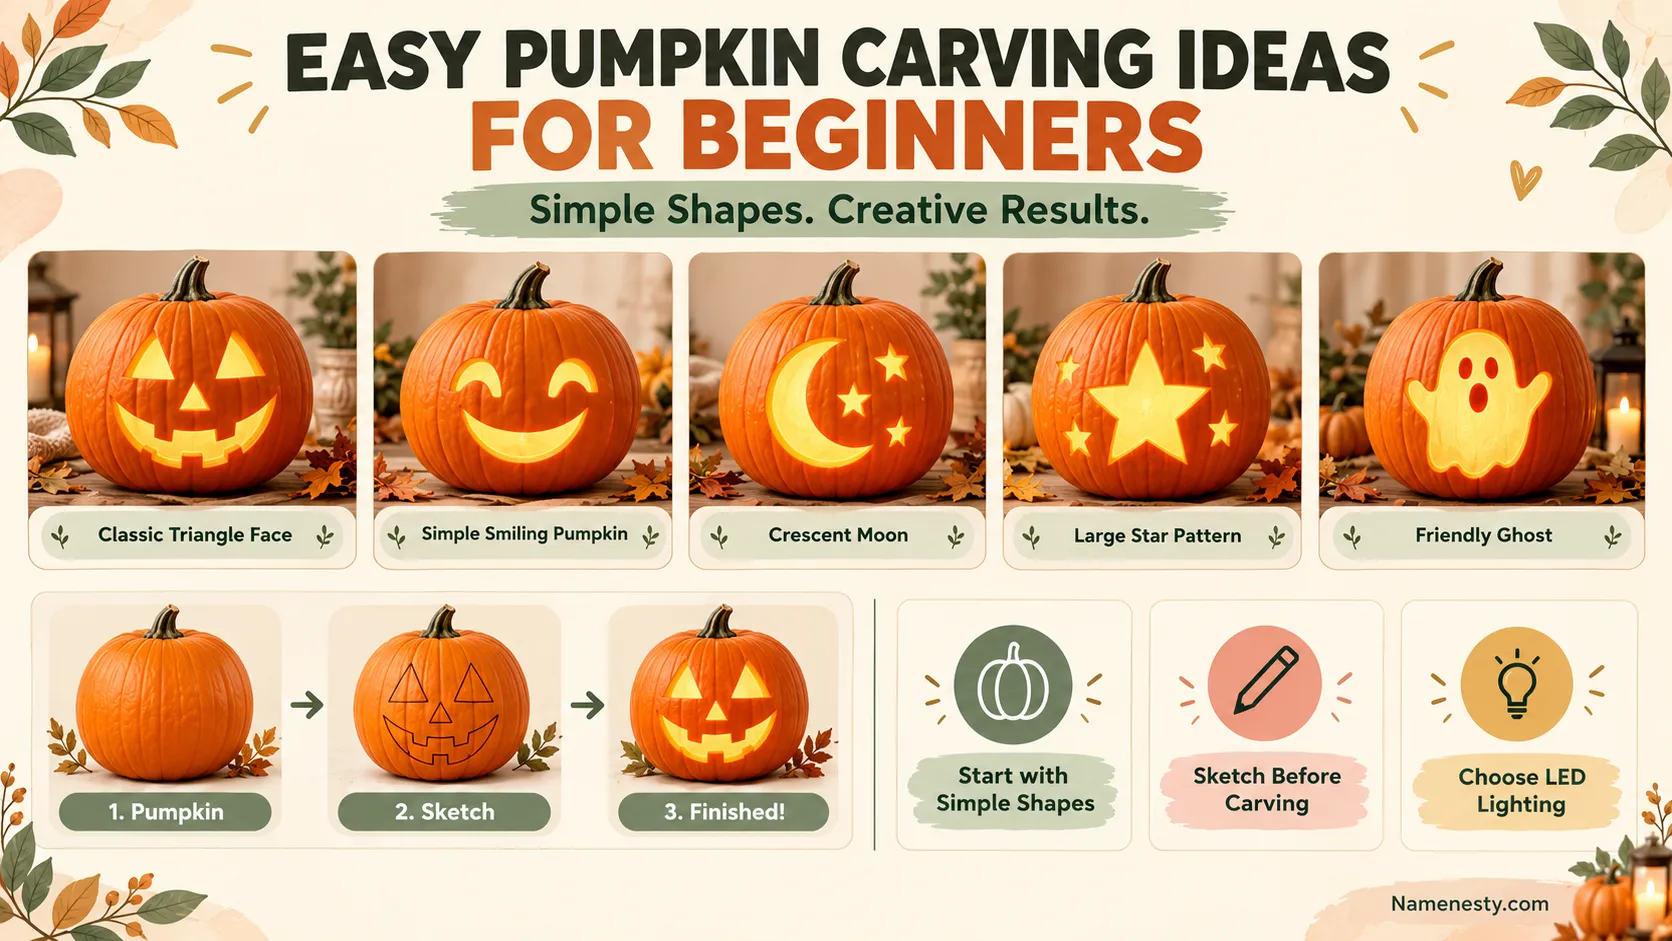
1. Easy Pumpkin Carving Ideas for Beginners
If you’re carving a pumpkin for the first time, begin with large shapes and simple outlines. These beginner-friendly ideas help you create a recognizable design without needing advanced tools or artistic experience.
- Classic Jack-o’-Lantern: Two triangle eyes and a cheerful, jagged smile.
- Happy Pumpkin: Round eyes and a wide, friendly grin.
- Surprised Face: Two large circular eyes and a small O-shaped mouth.
- Sleepy Pumpkin: Closed eyes and a tiny curved smile.
- One-Eyed Monster: A single oversized eye and a goofy mouth.
- Winking Pumpkin: One round eye, one closed eye, and a crooked grin.
- Simple Toothless Grin: Two square eyes and a broad, tooth-free smile.
- Tiny Triangle Face: Small triangle eyes and a short zigzag mouth.
- Heart-Eyed Pumpkin: Two heart-shaped eyes and a happy smile.
- Big-Mouth Pumpkin: A large rectangular mouth with simple square teeth.
- Freckled Pumpkin: A basic smile surrounded by a few small round holes.
- Sleepy Moon Face: Crescent-shaped eyes and a peaceful expression.
- Goofy Crooked Face: One high eye, one low eye, and an uneven smile.
- Friendly Ghost Face: Two round eyes and a curved mouth.
- Minimal Smiley: Two small circular eyes and one smooth curved smile.
Best tip: Choose a smooth pumpkin and draw your design with a washable marker before cutting. Large, separated shapes are generally easier to carve than thin lines or intricate details.
2. Simple Pumpkin Faces That Anyone Can Carve
A simple pumpkin face is a Halloween classic for a reason: a few well-placed shapes can communicate happiness, surprise, mischief, or fear. These designs are especially suitable for front porches, window displays, and traditional jack-o’-lanterns.
- The Classic Grin: Triangle eyes and a zigzag smile for a timeless Halloween look.
- The Happy Camper: Round eyes and an upward-curving mouth.
- The Shocked Face: Wide eyes and a large circular mouth.
- The Cheeky Smile: Small eyes and one raised corner of the mouth.
- The Sleepy Jack: Half-closed eyes and a gentle smile.
- The Silly Face: Uneven eyes and a wobbly mouth.
- The Evil Grin: Narrow eyes and a sharp, angled smile.
- The Gap-Toothed Pumpkin: A broad mouth with two large teeth.
- The Grumpy Face: Slanted eyebrows and a downward-curving mouth.
- The Laughing Pumpkin: Crescent-shaped eyes and a wide-open mouth.
- The Nervous Face: Small eyes and a wavy, uncertain mouth.
- The One-Tooth Wonder: Two eyes and one oversized tooth.
- The Sleepwalking Pumpkin: Droopy eyes and a tiny open mouth.
- The Mischievous Jack: One raised eyebrow and a crooked grin.
- The Tiny Smile: Two small eyes and a delicate curved mouth.
Best tip: Think about the expression before drawing. Upward curves usually look friendly, angled eyes create a more sinister effect, and large circular mouths communicate surprise.
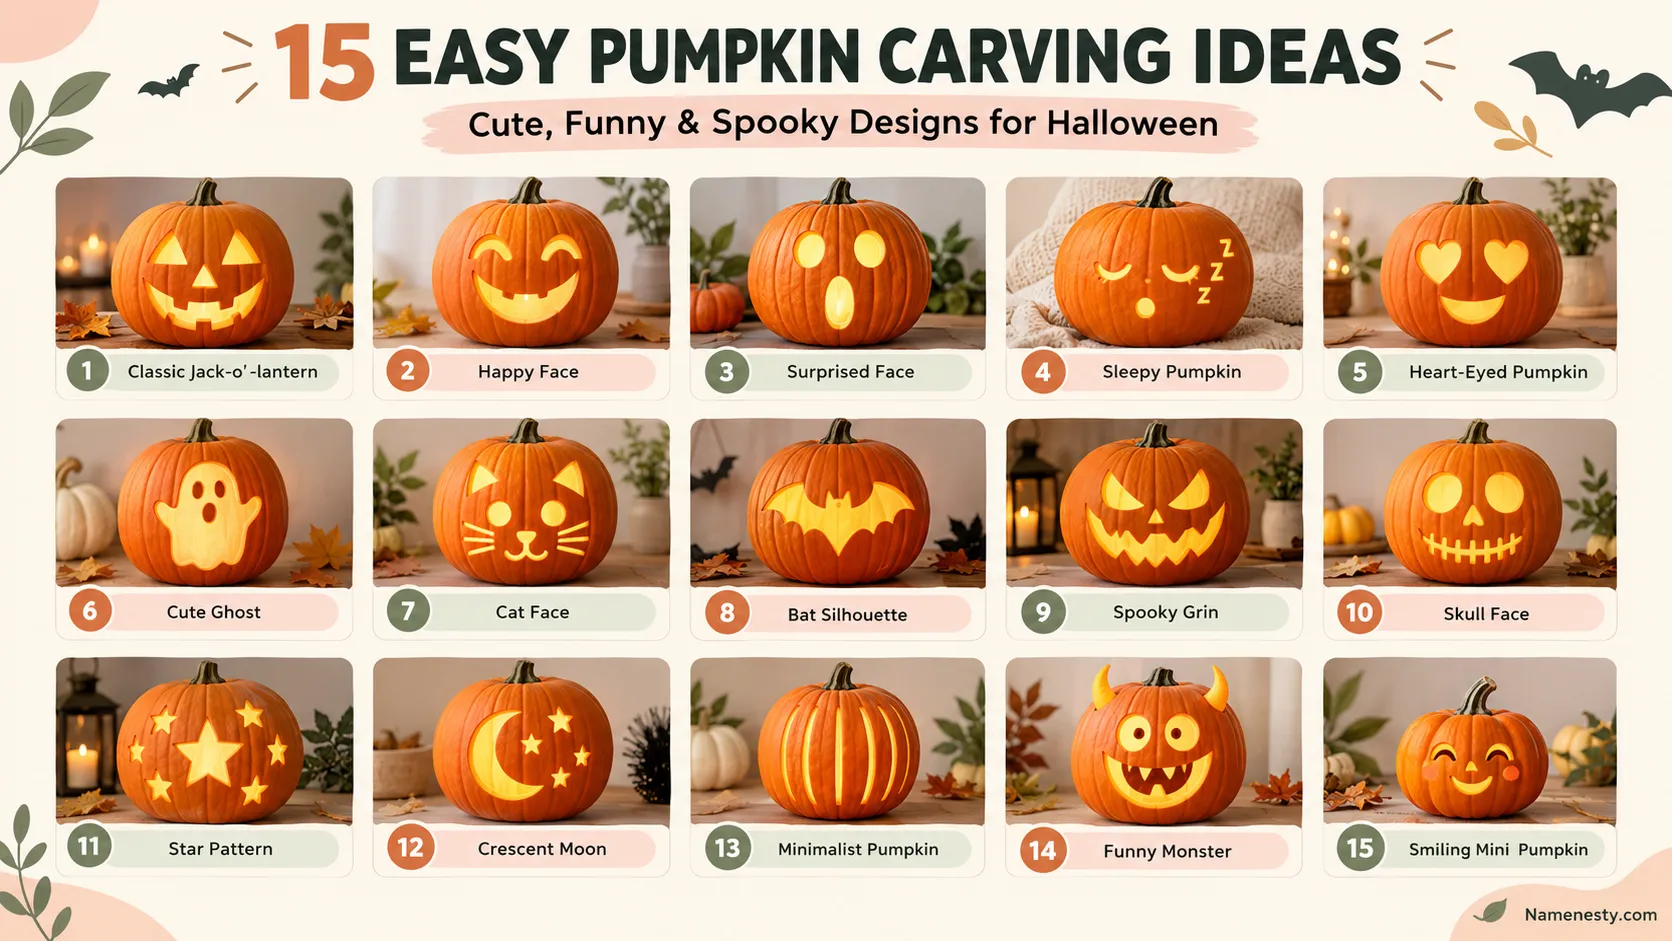
3. Cute Pumpkin Carving Ideas for Halloween
Cute pumpkin designs are perfect for cheerful Halloween decorations, family-friendly displays, and adorable seasonal photos. Use rounded shapes, friendly expressions, and recognizable symbols to create a softer alternative to traditional spooky faces.
- Heart-Eyed Cutie: Heart-shaped eyes with a small smile.
- Baby Ghost: Two round eyes and a tiny surprised mouth.
- Kitten Face: Pointed ears, round eyes, and simple whiskers.
- Smiling Star: A large star outline paired with a happy expression.
- Sleepy Cutie: Closed crescent eyes and a peaceful smile.
- Little Bat: A simple bat silhouette with rounded wings.
- Friendly Monster: One large eye and a small toothy grin.
- Pumpkin Bear: Round ears and a simple bear-like face.
- Sweet Moon: A crescent moon with a smiling face.
- Tiny Flower: A flower-shaped outline with a simple center.
- Baby Dragon: Two small horns and a playful mouth.
- Happy Owl: Large circular eyes and a small triangular beak.
- Little Witch: A simple face with a pointed hat silhouette.
- Smiling Cloud: A cloud outline with two eyes and a curved mouth.
- Pumpkin Besties: Two matching pumpkins with complementary happy expressions.
Best tip: Cute designs work best when their features are easy to recognize from a distance. Use rounded eyes and uncomplicated shapes, then place the finished pumpkin beside fairy lights or autumn leaves for a welcoming display.
4. Funny Pumpkin Carving Ideas That Make Everyone Smile
Funny pumpkins turn ordinary Halloween decorations into conversation starters. Exaggerated expressions, silly teeth, and unexpected facial features work well for parties, humorous photos, and short-form videos.
- The Cackling Pumpkin: A wide mouth with exaggerated square teeth.
- The Awkward Smile: A tiny smile positioned between oversized eyes.
- The Googly-Eyed Jack: Two enormous circular eyes and a tiny mouth.
- The Missing-Tooth Grin: A big smile with one noticeable gap.
- The Tongue-Out Pumpkin: A simple mouth with a tongue-shaped cutout.
- The Sleep-Deprived Jack: Droopy eyes and a crooked frown.
- The Screaming Pumpkin: A dramatic open mouth and raised eyebrows.
- The Confused Pumpkin: One raised eyebrow and one lowered eyebrow.
- The Sneaky Grin: Narrow eyes and a sideways smile.
- The Pickle-Faced Pumpkin: A long, wavy mouth with an exaggerated expression.
- The Fake Mustache: A basic face with a bold mustache silhouette.
- The Tiny-Mouth Giant: Large eyes above an unusually small mouth.
- The Laughing Villain: Narrow eyes and a broad, mischievous grin.
- The Upside-Down Smile: A deliberately inverted expression.
- The Pumpkin Meme Face: An exaggerated surprised expression inspired by reaction memes.
Best tip: Funny designs need only one strong visual joke. A missing tooth or oversized eye can make a pumpkin more memorable than a complicated pattern.
5. Scary Pumpkin Carving Ideas for a Spooky Night
For a more frightening Halloween display, focus on sharp angles, deep-looking expressions, and dramatic silhouettes. These designs are particularly effective when illuminated in a dim setting with a safe LED light.
- The Evil Jack: Narrow eyes and a sharp, jagged grin.
- The Vampire Pumpkin: Pointed teeth and angled eyebrows.
- The Haunted Smile: A long, uneven mouth with irregular teeth.
- The Angry Monster: Slanted eyes and a deep frown.
- The Screaming Ghost: Hollow-looking eyes and a large open mouth.
- The Wicked Witch: A crooked nose silhouette and a sinister smile.
- The Spider Pumpkin: A simple spider silhouette across the front.
- The Bat Cave: A bat silhouette framed by a wide opening.
- The Haunted Window: A small house silhouette with glowing windows.
- The Skull Face: Large eye sockets and a simplified tooth pattern.
- The Creepy Grin: Thin eyes and an exaggerated smile.
- The One-Eyed Beast: A large central eye and an angular mouth.
- The Monster Bite: A wide mouth with uneven pointed teeth.
- The Midnight Cat: A black-cat silhouette with pointed ears.
- The Shadow Face: A simple angular face designed to cast dramatic shadows.
Best tip: Spooky designs don’t have to be complicated. High-contrast openings, angular expressions, and careful placement of the light often create the strongest nighttime effect.
6. Easy Pumpkin Carving Ideas for Kids and Families
Pumpkin decorating can become a memorable family tradition when everyone has a role. Let children choose designs, sketch faces, sort decorations, or help scoop seeds, while adults handle sharp carving tools.
- Happy Family Pumpkin: A friendly face everyone can help design.
- Three-Circle Monster: Three large round openings arranged as a silly face.
- Friendly Ghost: A simple ghost outline with two eyes.
- Rainbow-Inspired Pumpkin: A broad arch pattern, with paint added for color if desired.
- Starry Night Pumpkin: Large stars scattered across the surface.
- Smiling Sun: A circular face with simple ray shapes.
- Little Owl: Two large eyes and a simple beak.
- Happy Cat: Two pointed ears, round eyes, and a smile.
- Family Initials: A large initial or simple letter on the pumpkin.
- Boo! Pumpkin: Three bold letters carved or painted.
- Friendly Dinosaur: A simple dinosaur silhouette with a recognizable head and tail.
- Moon and Stars: A crescent moon with a few larger stars.
- Silly Alien: One oversized eye and a tiny mouth.
- Pumpkin Puzzle Face: Separate simple shapes that combine into a funny expression.
- Matching Family Pumpkins: Give each family member a pumpkin with a different face.
Best tip: For young children, no-carve activities are a great alternative. Markers, stickers, and washable paint let little ones personalize a pumpkin without handling cutting tools. The American Academy of Orthopaedic Surgeons recommends leaving carving to adults and using artificial pumpkin lights for safer displays.
AAOS+1
7. Small Pumpkin Carving Ideas for Mini Pumpkins
Mini pumpkins are ideal for desks, shelves, centerpieces, and compact Halloween displays. Because their surfaces are limited, choose one bold feature rather than trying to squeeze a detailed design onto a tiny pumpkin.
- Mini Smiley: Two tiny eyes and a simple curved mouth.
- Little Star: One large star-shaped opening.
- Mini Ghost: Two small eyes and a rounded mouth.
- Tiny Cat: A pair of pointed ears and a basic face.
- Single Heart: One heart-shaped cutout.
- Mini Crescent Moon: A curved moon silhouette.
- Tiny Bat: One bold bat outline.
- Mini Jack-o’-Lantern: A classic triangle-eyed face.
- Little Spider: A central body with simple leg shapes.
- Tiny Skull: Two large eye openings and a short mouth.
- Mini Polka Dots: A few evenly spaced circular openings.
- Little Owl: Two large eyes and a small beak.
- Tiny Lightning Bolt: One bold zigzag shape.
- Mini Grumpy Face: Slanted eyes and a frown.
- Pumpkin Trio: Three mini pumpkins with happy, surprised, and spooky faces.
Best tip: Pick a small pumpkin with a relatively smooth surface. Tiny cuts can be difficult to control, so keep the design simple. If carving feels too fiddly, paint the details instead.
8. Minimalist Pumpkin Carving Ideas for a Modern Look
Minimalist pumpkin carving is all about clean shapes, intentional spacing, and understated details. These designs suit contemporary homes, neutral Halloween decor, and Pinterest-inspired seasonal arrangements.
- Single Crescent: One elegant crescent-shaped opening.
- Minimal Smile: Two tiny eyes and one clean curved mouth.
- Three Vertical Lines: A neat trio of narrow openings.
- Geometric Triangle: One large, precisely outlined triangle.
- Scattered Stars: A few stars with generous spacing.
- Moon Phase Pumpkin: A sequence of simple moon shapes.
- Linear Arch: One broad arch-shaped opening.
- Tiny Constellation: Several small stars connected visually by their arrangement.
- Abstract Circle: A single circular opening near the center.
- Modern Half Face: One eye and half a smile for an artistic look.
- Symmetrical Eyes: Two identical oval openings.
- Simple Diamond: One bold diamond shape.
- Minimal Cat Silhouette: A clean cat outline with minimal detail.
- Elegant Leaf: One large leaf-shaped opening.
- Negative-Space Face: A few carefully spaced shapes that suggest a face without outlining every feature.
Best tip: Resist the temptation to fill every space. Minimalist designs look intentional when the shapes have room to breathe. Arrange your pumpkin with neutral fabric, dried foliage, or simple autumn accents to complement the style.
- Explore More: https://namenesty.com/4-weeks-captions/
9. Unique Pumpkin Carving Ideas That Stand Out
Want something different from the usual triangle eyes and zigzag smile? These creative designs use unusual silhouettes, unexpected expressions, and personalized details to make your Halloween display more distinctive.
- The Peekaboo Pumpkin: A large opening with a smaller face inside.
- The Monster Mouth: An exaggerated mouth that dominates the front.
- The Starburst Pumpkin: One central shape surrounded by simple rays.
- The Haunted House: A house silhouette with cutout windows.
- The Moonlit Forest: A simple line of tree silhouettes.
- The Flying Bats: Several bat shapes arranged across the surface.
- The Crescent-Eyed Face: Moon-shaped eyes and a curved grin.
- The Checkerboard Pumpkin: Alternating square openings in a simple pattern.
- The Cosmic Pumpkin: A large moon with scattered stars.
- The Crooked Window: An irregular window-like opening for a haunted-house effect.
- The Side-Eye Pumpkin: One prominent eye looking sideways.
- The Spiral Smile: A simple spiral-inspired mouth.
- The Leaf Pattern: A few large leaf-shaped cutouts.
- The Initial Pumpkin: A large letter representing your name or family.
- The Double-Expression Pumpkin: A friendly face on one side and a spooky face on the other.
Best tip: Personalization can make a simple design feel original. Try a favorite initial, a recognizable silhouette, or an expression inspired by your own sense of humor.
10. Cat, Ghost, and Animal Pumpkin Carving Ideas
Animals and Halloween characters are a fun way to move beyond traditional jack-o’-lanterns. Start with a recognizable outline and avoid narrow sections that could break during carving.
- Black Cat: Pointed ears, a rounded head, and a curved tail silhouette.
- Friendly Ghost: A flowing outline with two circular eyes.
- Flying Bat: Broad wings with a simple central body.
- Wise Owl: Two large eyes and a short beak.
- Creepy Spider: A central body with bold legs.
- Little Fox: Pointed ears and a narrow face.
- Sleepy Moon Cat: A cat curled into a crescent shape.
- Tiny Dinosaur: A recognizable dinosaur profile with a short tail.
- Howling Wolf: A simplified wolf-head silhouette.
- Happy Frog: Two raised eyes and a wide smile.
- Friendly Monster: One eye, two horns, and a goofy mouth.
- Little Bat Face: Two pointed ears and small fangs.
- Halloween Crow: A simple bird silhouette with a pointed beak.
- Smiling Pumpkin Owl: Large eyes combined with a rounded owl outline.
- Ghost Cat: A cat-shaped silhouette with a ghostly expression.
Best tip: Sketch the outline on paper first. For cats, bats, and other silhouette designs, keep narrow legs, tails, and ears thick enough to remain attached to the pumpkin.
11. Easy Pumpkin Stencil Ideas for Clean Designs
Stencils help you transfer a pattern accurately, especially when you want symmetrical eyes, clean silhouettes, or consistent lettering. They’re useful for beginners who feel more confident following an outline than drawing freehand.
- Basic Jack-o’-Lantern Stencil: Triangle eyes and a zigzag smile.
- Smiling Face Template: Round eyes and a curved mouth.
- Scary Eyes Stencil: Narrow eyes with angled brows.
- Ghost Outline: A simple ghost silhouette.
- Cat Silhouette: A rounded body, pointed ears, and a tail.
- Bat Pattern: One bold flying-bat shape.
- Star Template: A single large five-pointed star.
- Moon Stencil: A simple crescent.
- Heart Pattern: One large heart with smooth curves.
- Spiderweb Design: A simplified web with wide openings.
- Owl Face Template: Two large eyes and a beak.
- Haunted House Pattern: A house outline with a few windows.
- Letter Stencil: A single large initial or short word.
- Geometric Pattern: A small group of circles, triangles, or diamonds.
- Pumpkin Trio Template: Three matching faces in different expressions.
Best tip: Tape the stencil securely to a clean, dry pumpkin and transfer its outline before cutting. Choose templates with broad shapes and sturdy connecting sections. Consumer Reports recommends planning the design and selecting a suitable pumpkin before starting the carving process.
Consumer Reports+1
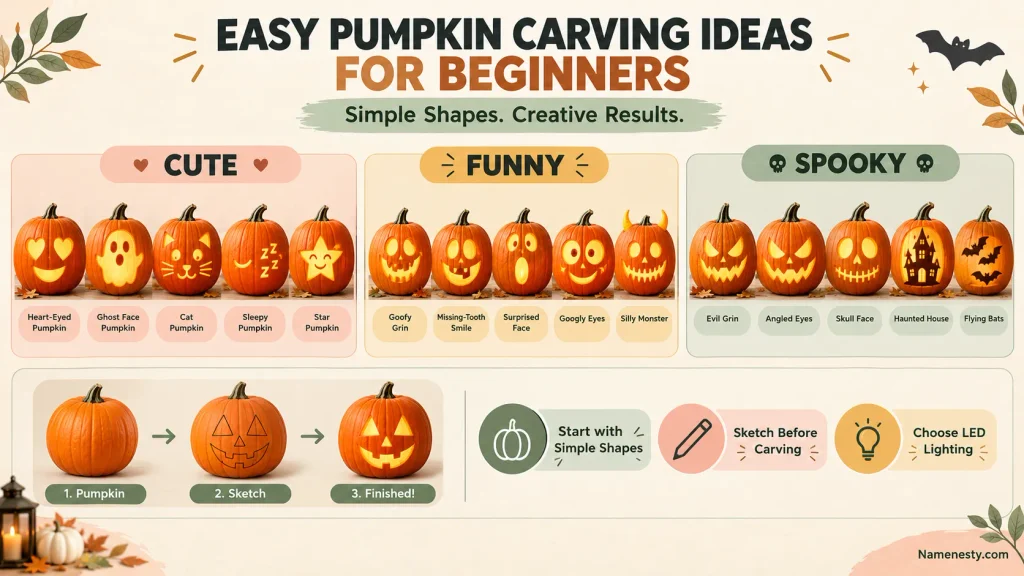
12. Last-Minute Pumpkin Carving Ideas That Save Time
When Halloween is only hours away, choose one central feature instead of a detailed design. These quick projects can help you create a finished decoration without turning your evening into a lengthy craft session.
- Quick Triangle Face: The classic three-shape jack-o’-lantern.
- One Big Star: A single bold star opening.
- Simple Smile: Two round eyes and a curved mouth.
- Surprised Face: Two large eyes and one circular mouth.
- Three Dots: Three circular openings arranged in a row.
- Quick Ghost: Two eyes and a simple open mouth.
- Single Crescent Moon: One clean moon silhouette.
- Tiny Bat: One large, uncomplicated bat shape.
- Bold Initial: A single large letter.
- Winking Face: One eye and one curved line for the other.
- Easy Grin: A broad mouth with minimal teeth.
- One-Eyed Monster: One eye and a short mouth.
- Simple Cat Face: Two pointed ears and a pair of eyes.
- Mini Star Cluster: A few large stars rather than many tiny ones.
- Painted Jack-o’-Lantern: Draw a face with paint or markers when you don’t have time to carve.
Best tip: Keep the preparation simple. Choose the design first, gather your tools, and set up a stable work surface. If you’re short on time or don’t have suitable carving tools, painting a pumpkin can be the quickest alternative.
13. No-Carve Pumpkin Decorating Ideas for Easy Halloween Decor
Not every pumpkin needs to be cut to look festive. No-carve designs are especially useful for families with young children, renters who want a mess-free project, or anyone who prefers a decorative pumpkin that can remain intact.
- Painted Smiley Pumpkin: Draw a cheerful face with washable or suitable craft paint.
- Black Cat Pumpkin: Paint pointed ears, eyes, and whiskers.
- Ghost Pumpkin: Add a white ghost shape and simple facial details.
- Polka-Dot Pumpkin: Cover the surface with evenly spaced dots.
- Gold Accent Pumpkin: Add metallic paint details for a refined look.
- Rainbow Pumpkin: Paint broad colorful bands across the surface.
- Mummy Pumpkin: Wrap it with fabric strips or gauze, leaving space for the eyes.
- Sticker Face: Use removable stickers to create a funny expression.
- Flower Pumpkin: Add painted flowers or craft decorations.
- Glitter Accent Pumpkin: Decorate selected areas with craft glitter.
- Witch Hat Pumpkin: Add a paper or fabric hat.
- Monster-Eye Pumpkin: Attach oversized craft eyes using an appropriate adhesive.
- Chalkboard Pumpkin: Apply suitable chalkboard paint and draw a Halloween message.
- Patterned Pumpkin: Use simple stripes, checks, or geometric shapes.
- Personalized Pumpkin: Add a name, initials, or a short seasonal message.
Best tip: Choose materials suitable for the pumpkin’s surface and intended display location. Keep decorations away from heat sources, and use battery-powered lighting if you want a glowing effect without cutting the pumpkin.
14. Easy Pumpkin Carving Ideas for Instagram, TikTok, and Pinterest
A well-designed pumpkin can become more than a Halloween decoration; it can also be a photo subject, a short DIY video, or a Pinterest inspiration pin. Choose a design that reads clearly on a small screen and photograph it against a simple background.
- The Before-and-After Pumpkin: Show the uncarved pumpkin beside the finished design.
- The Classic Jack Portrait: Photograph a traditional face against a dark background.
- The Cute Pumpkin Close-Up: Focus on heart eyes or a tiny smile.
- The Funny Reaction Pumpkin: Capture an exaggerated expression for a humorous post.
- The Spooky Night Shot: Photograph a scary pumpkin glowing in low light.
- The Mini Pumpkin Collection: Arrange three or more mini designs together.
- The Minimalist Pumpkin: Use a neutral background and soft natural light.
- The Carving Process Reel: Show the drawing, carving, and final reveal.
- The Stencil Tutorial: Demonstrate how to transfer a simple pattern.
- The Family Pumpkin Display: Photograph a row of different family-designed pumpkins.
- The Cat Pumpkin Reveal: Feature a recognizable cat silhouette.
- The Pumpkin Glow Shot: Focus on the light shining through the carved openings.
- The Satisfying Cleanup Video: Show the finished design after removing the cut pieces.
- The Halloween Porch Setup: Include the pumpkin in a larger seasonal display.
- The Design Challenge: Compare a simple beginner pumpkin with a more elaborate version.
Best tip: Match the content to the platform. Use Pinterest for clear, useful inspiration images; Instagram for polished photos and Reels; and TikTok for process videos, transformations, and quick tutorials. No caption or format guarantees virality, so prioritize a strong visual, an understandable idea, and an authentic presentation.
Bonus: Caption Ideas for Your Finished Pumpkin
Here are five short captions you can pair with your carving photos:
- “Pumpkin perfection, one cut at a time.”
- “A little spooky, a lot of personality.”
- “Carved with creativity, ready for Halloween.”
- “From plain pumpkin to spooky masterpiece.”
- “Just here for the boos and pumpkin views.”
15. Easy Pumpkin Carving Tips for Safer, Better Results
The best pumpkin carving projects begin with good preparation. A suitable pumpkin, a clear design, and the right tools can make the process easier while helping your finished decoration look neat and intentional.
- Choose a firm pumpkin: Look for a pumpkin without soft spots, serious damage, or visible mold.
- Pick the design first: Match the pumpkin’s size and shape to your chosen pattern.
- Gather your supplies: Prepare a marker, scoop, suitable carving tools, and a container for scraps.
- Use a stable work surface: Place the pumpkin on a flat, steady surface where it won’t roll.
- Draw before cutting: Sketch your design or use a stencil to plan the outlines.
- Keep shapes simple: Large eyes and broad mouths are generally easier than fine details.
- Work in good lighting: Make sure you can clearly see the pattern and cutting area.
- Use purpose-designed tools: Select suitable pumpkin-carving tools and follow their instructions.
- Keep your hands dry: Pumpkin pulp and moisture can make handling tools more difficult.
- Cut away from yourself: Keep your free hand out of the cutting path and never rush.
- Leave sturdy connections: Avoid cutting narrow sections that could break away from the design.
- Clean out excess pulp: Remove loose material so your design and lighting remain clear.
- Preserve the pumpkin’s shape: Avoid removing more material than the pattern requires.
- Choose safer lighting: Use a battery-powered LED light instead of an open flame.
- Photograph your finished work: Take pictures before the pumpkin begins to soften.
How to Choose the Best Easy Pumpkin Carving Idea
With so many designs available, the easiest way to decide is to consider your experience, available time, pumpkin size, and desired look.
- Explore More: https://namenesty.com/regularly-captions/
| Your goal | Best design choices | Why they work |
| First-time carving | Classic face, simple smile | Large shapes are easier to manage |
| Cute decorations | Heart eyes, friendly ghost | Simple features create a playful expression |
| Spooky atmosphere | Evil grin, skull face | Angular shapes create a dramatic look |
| Modern decor | Crescent, stars, geometric shapes | Clean outlines suit minimalist displays |
| Small pumpkins | Single heart, star, or smile | One main feature avoids overcrowding |
| Family activity | Friendly faces, painted pumpkins | Designs can be adapted to different ages |
| Quick Halloween project | Triangle face, single star | Fewer cuts mean less preparation |
| Social media photos | Cat silhouette, funny face | Distinct shapes read clearly in photos |
| No sharp tools | Painted faces, stickers | Decorating can be done without carving |
| Outdoor display | Classic jack-o’-lantern, bold silhouette | Larger openings are easy to see from a distance |
Which pumpkin designs are easiest to carve?
The easiest designs usually have a few large, separate shapes, such as triangle eyes, a curved smile, a star, or a simple ghost silhouette. They require less precision than fine lettering, detailed portraits, or intricate webs.
Which pumpkin designs look best at night?
Designs with recognizable openings and clear spaces between shapes often look striking when illuminated. Classic faces, crescent moons, stars, and broad silhouettes are useful starting points. Use LED lighting for a safer glow.
How can you make a simple pumpkin look unique?
Personalize the expression, use a silhouette that reflects your interests, arrange several pumpkins together, or experiment with placement and lighting. A distinctive idea doesn’t need to be complicated to feel original.
People Also Ask: Easy Pumpkin Carving Ideas
A classic jack-o’-lantern face is one of the easiest designs. Start with two triangle eyes and a simple smile, then gradually try more detailed patterns as your confidence improves.
Choose a firm pumpkin, sketch a simple design, prepare a stable work surface, and use suitable pumpkin-carving tools. Work slowly and cut away from yourself. Adults should handle sharp tools when children are involved.
Friendly faces, large stars, simple ghosts, and smiling cats are good choices. Young children can draw designs or decorate pumpkins with paint and stickers while adults handle the cutting.
Try narrow eyes, an angular grin, pointed teeth, or a simple skull silhouette. Position an LED light inside the finished pumpkin to emphasize its expression in low light.
Small pumpkins work well with a single star, heart, smile, or simple face. Avoid intricate designs with many tiny openings because the limited surface makes them harder to execute.:
A basic face may take around 15–25 minutes to carve once the pumpkin is prepared. More detailed designs can take 30 minutes or longer. Cleaning, transferring patterns, and arranging the display add extra time.
Conclusion: Find Your Perfect Easy Pumpkin Carving Idea
Creating a memorable Halloween pumpkin doesn’t require advanced artistic skills. A classic smiling face, a cute ghost, a spooky grin, or a simple star can turn an ordinary pumpkin into a festive decoration.
Start by choosing a design that matches your skill level and available time. Beginners can stick with large, uncomplicated shapes, while experienced carvers can experiment with silhouettes, stencils, and more distinctive expressions. If you prefer a family-friendly activity without sharp tools, painting and decorating offer plenty of creative possibilities.
For the best results, plan your design before cutting, work carefully, and choose LED lighting for your finished display. If you’re sharing your creation on Instagram, TikTok, or Pinterest, take a clear photo or capture a short before-and-after video.
Your next step: Pick your favorite design from this list, save it for Halloween, and make it your own. You can also explore related Halloween captions on Namenesty.com to find words that match your finished pumpkin.







3 thoughts on “Easy Pumpkin Carving Ideas: Cute, Funny & Spooky”